
Notice
Recent Posts
Recent Comments
Link
| 일 | 월 | 화 | 수 | 목 | 금 | 토 |
|---|---|---|---|---|---|---|
| 1 | 2 | 3 | 4 | 5 | 6 | |
| 7 | 8 | 9 | 10 | 11 | 12 | 13 |
| 14 | 15 | 16 | 17 | 18 | 19 | 20 |
| 21 | 22 | 23 | 24 | 25 | 26 | 27 |
| 28 | 29 | 30 |
Tags
- Kali#Linux#KALI#LINUX#INSTALL#github#설치
- 모듈 프로젝트
- 쉴더스
- 클라우드 보안 기술
- 클라우드 보안 기반
- 개인정보보호
- DVWA#Brute#Force#Attack#Test#Kali#Linux#Medium#Level#sleep
- 기술 특강 및 OT
- 인프라 활용을 위한 파이썬
- Kali#Linux#Brute#Force#Attack#Test#DVWA#Hacking#Low#무차별#대입#공격#해킹
- 모듈프로젝트
- 애플리케이션 보안 기술
- 클라우드 기반
- 시스템-네트워크 보안 기술
- 루키즈
- DVWA#INSTALL#github#security#kali#linux
- 보고서
- 29기
- sk 쉴더스 루키즈
- 클라우드기반 보안 시스템 구축/운영 실무
- CERT
- VMWARE#INSTALL#설치
- 모의침투
- rocky linux#siem#project#threat detection#soc#onpremise#ids#python#csv#pipeline#kali linux#DVWA#security monitoring
- AI #취업
- kisa #보안관제
- sk shieldus
- Case Study
- #루키즈
- Foxyproxy#install#setting#firefox
Archives
- Today
- Total
이것저것
[SK shieldus Rookies 29기] 8일차 본문
8일차 강의
Shodan API, 영화 검색 API, MongoDB를 활용한 실전 프로젝트
📌 Part 1: API 활용 - OSINT & Shodan
1️⃣ OSINT란?
정의
OSINT (Open-Source Intelligence)는 '공개 출처 정보'의 약자로, 웹사이트, 소셜 미디어, 공공 데이터베이스 등 누구나 합법적으로 접근할 수 있는 공개된 정보를 수집하고 분석하는 활동입니다.
활용 분야
- 사이버 위협 파악
- 범죄 수사
- 비즈니스 환경 분석
- 네트워크 보안 점검
주요 OSINT 도구
- Google - 검색 엔진
- Archive.org - 웹 아카이빙
- Shodan - 인터넷 연결 기기 검색
- CriminalIP - IP 정보 분석
2️⃣ Shodan이란?
정의
Shodan은 전 세계적으로 인터넷에 연결된 IP 정보(서버, IoT 기기 등)를 크롤링하는 검색 엔진입니다.
특징
- 포트 기반 검색 - 서비스와 연결된 포트 정보 수집
- IoT 기기 검색 - 웹캠, 라우터, 서버 등
- 보안 취약점 파악 - 노출된 서비스 탐지
🔗 공식 사이트
https://www.shodan.io/3️⃣ Shodan API 사용하기
설치
pip install shodanAPI 키 발급
- Shodan 웹사이트 접속
- 계정 생성 및 로그인
- 계정 페이지에서 API 키 확인
기본 사용 예제
import shodan
import json

# API 키 설정
SHODAN_API_KEY = "YOUR_API_KEY"
api = shodan.Shodan(SHODAN_API_KEY)

# 검색어 설정
query = 'webcam'

# 검색 실행
results = api.search(query)
print(f"총 결과: {results['total']}")

# 상위 2개 결과 출력
try:
    for match in results['matches'][:2]:
        print(f"IP 정보: {match['ip_str']}")
        print(f"포트 정보: {match['port']}")
        print(f"조직: {match.get('org', 'N/A')}")
        print(f"국가: {match['location']['country_name']}")
        print("=" * 40)

except shodan.APIError as e:
    print(f"오류: {e}")
출력 예시
총 결과: 3306
IP 정보: 8.221.139.222
포트 정보: 15673
조직: Alibaba Cloud (Singapore) Private Limited
국가: Japan
========================================
IP 정보: 163.172.152.168
포트 정보: 9000
조직: Scaleway Dedibox - Paris, France
국가: France
========================================
4️⃣ 영화 검색 API (OMDB)
OMDB API란?
OMDB (Open Movie Database)는 영화 정보를 제공하는 무료 API입니다.
🔗 공식 사이트
https://www.omdbapi.com/API 키 발급
- OMDB 웹사이트 접속
- 이메일로 무료 API 키 요청
- 이메일에서 API 키 확인
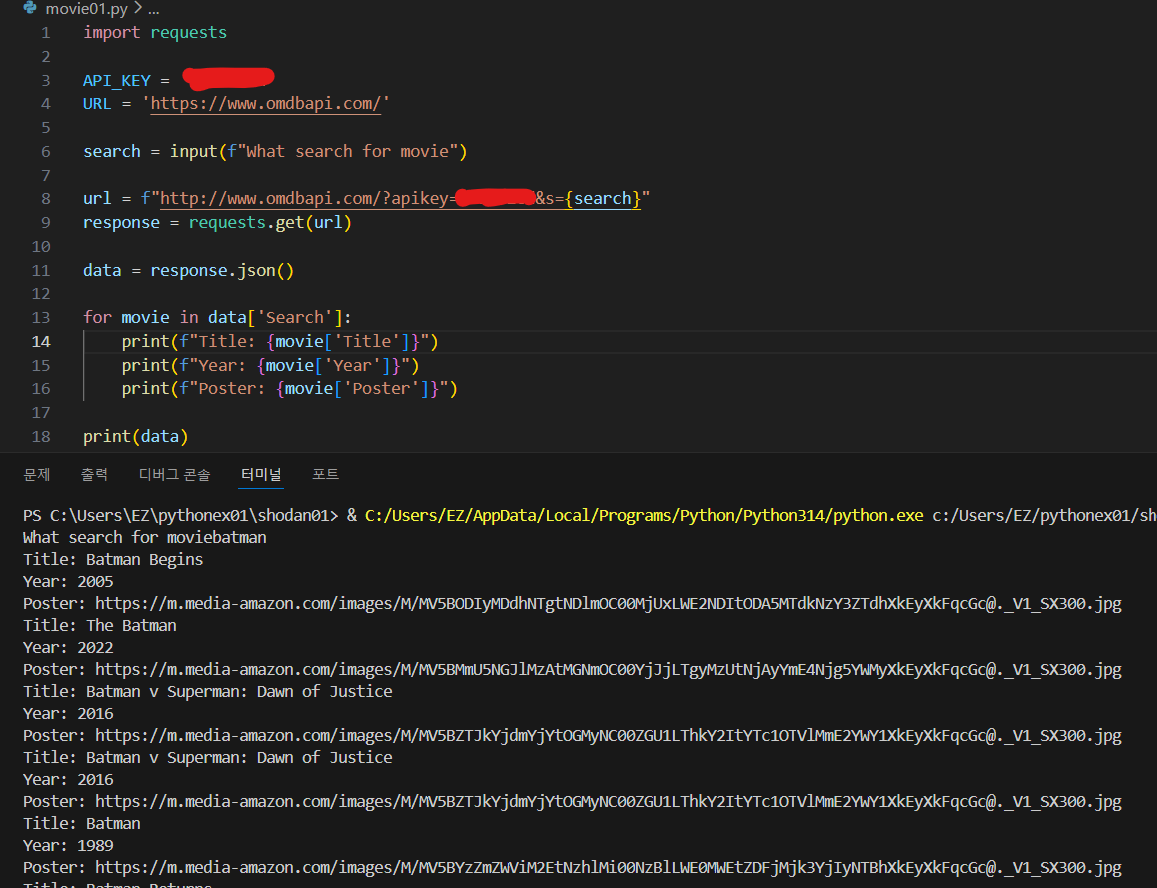
기본 사용 예제
import requests

# API 설정
API_KEY = 'YOUR_API_KEY'
URL = 'https://www.omdbapi.com/'

# 검색어 입력
search = input("검색할 영화를 입력하세요: ")

# API 요청 (방법 1: params 사용)
params = {'apikey': API_KEY, 's': search}
response = requests.get(URL, params=params)

# API 요청 (방법 2: URL 직접 구성)
# url = f"http://www.omdbapi.com/?apikey={API_KEY}&s={search}"
# response = requests.get(url)

# JSON 파싱
data = response.json()

# 결과 출력
for movie in data['Search']:
    print(f"제목: {movie['Title']}")
    print(f"년도: {movie['Year']}")
    print(f"포스터: {movie['Poster']}")
    print("=" * 40)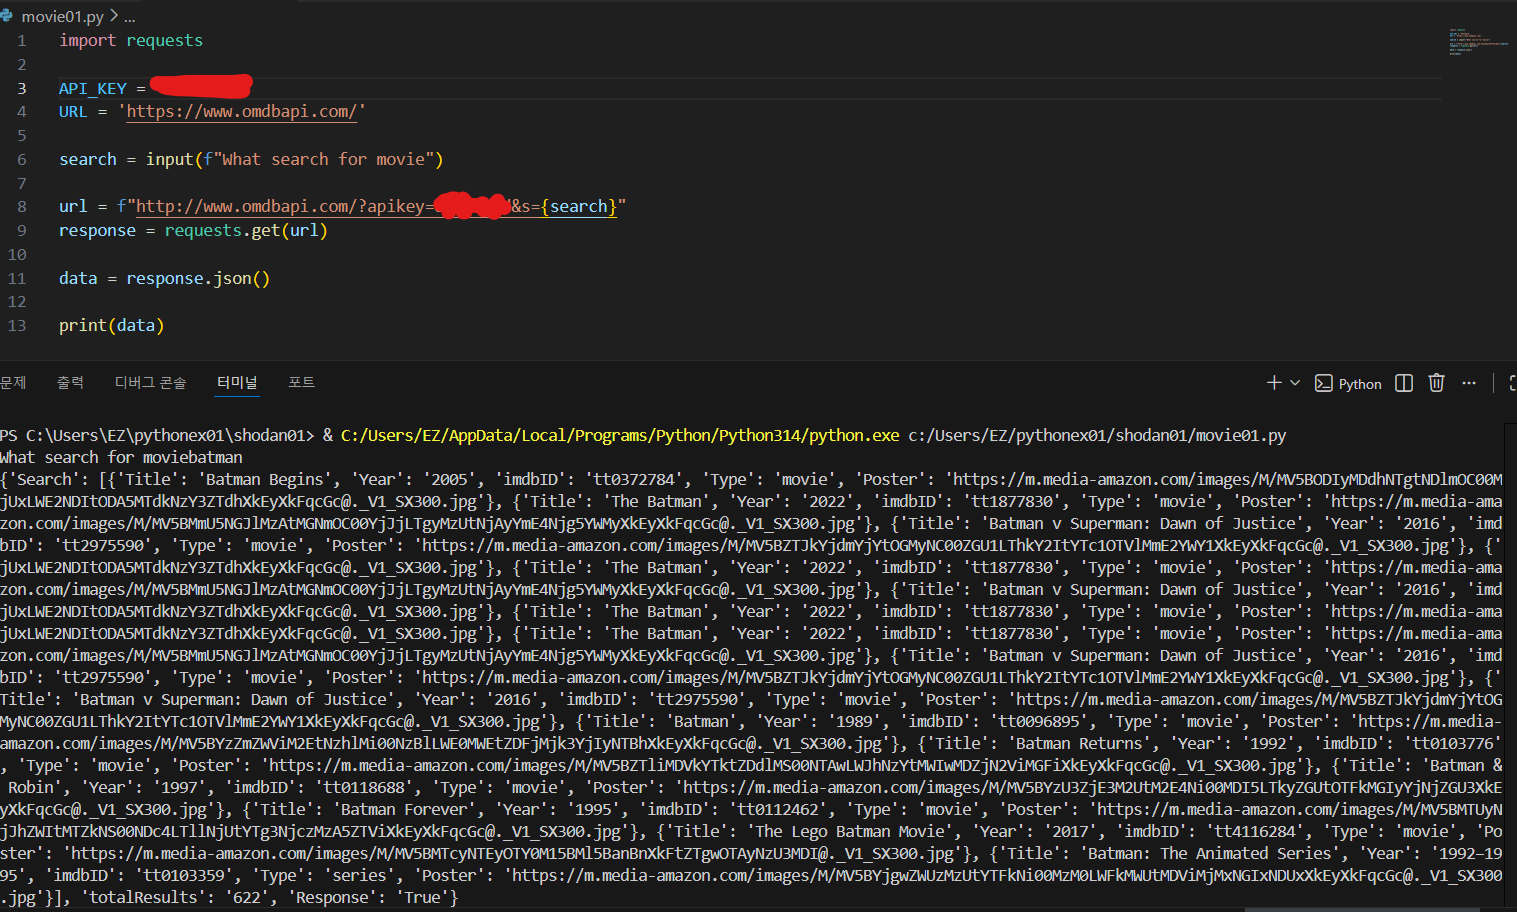
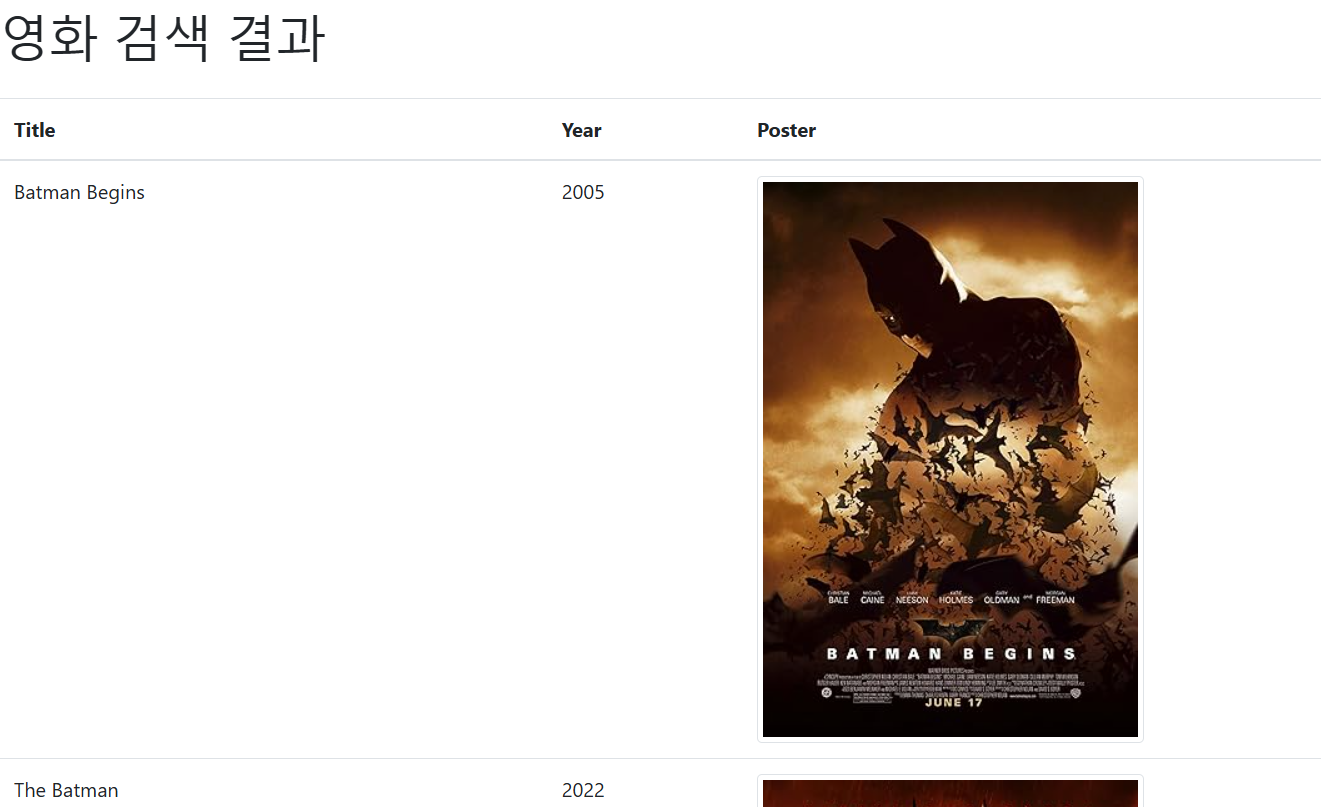
5️⃣ 실습 1️⃣: Flask 영화 검색 웹 서비스
요구사항
- 사용자로부터 영화 제목 입력받기
- OMDB API로 영화 정보 검색
- 결과를 테이블로 표시 (포스터 이미지 포함)
디렉토리 구조
project/
├── app.py
├── templates/
│   ├── index.html
│   └── result.html
└── static/
Flask 앱 (app.py)
from flask import Flask, render_template, request
import requests

app = Flask(__name__)

@app.route('/')
def index():
    return render_template('index.html')

@app.route('/search', methods=['GET', 'POST'])
def search():
    # 사용자 입력 받기
    query = request.form['query']

    # OMDB API 요청
    url = f'http://www.omdbapi.com/?s={query}&apikey=YOUR_API_KEY'
    response = requests.get(url)
    data = response.json()

    # 영화 정보 추출
    movies = []
    for movie in data['Search']:
        title = movie['Title']
        year = movie['Year']
        poster = movie['Poster']
        movies.append({'title': title, 'year': year, 'poster': poster})

    return render_template('result.html', movies=movies)

if __name__ == '__main__':
    app.run(debug=True)
검색 페이지 (templates/index.html)
<!DOCTYPE html>
<html>
<head>
    <meta charset="UTF-8">
    <title>영화 검색</title>
    <style>
        body {
            font-family: Arial, sans-serif;
            max-width: 600px;
            margin: 50px auto;
            text-align: center;
        }
        input[type="text"] {
            width: 300px;
            padding: 10px;
            font-size: 16px;
        }
        input[type="submit"] {
            padding: 10px 20px;
            font-size: 16px;
            background-color: #4CAF50;
            color: white;
            border: none;
            cursor: pointer;
        }
    </style>
</head>
<body>
    <h1> 영화 검색 서비스</h1>
    <form action="{{ url_for('search') }}" method="POST">
        <label><b>영화 검색:</b></label><br><br>
        <input type="text" name="query" placeholder="영화 제목을 입력하세요" required>
        <input type="submit" value="검색">
    </form>
</body>
</html>
결과 페이지 (templates/result.html)
<!DOCTYPE html>
<html>
<head>
    <meta charset="UTF-8">
    <title>영화 검색 결과</title>
    <link rel="stylesheet" href="https://stackpath.bootstrapcdn.com/bootstrap/4.3.1/css/bootstrap.min.css">
</head>
<body>
    <div class="container my-5">
        <h1 class="mb-4"> 영화 검색 결과</h1>
        <table class="table table-striped">
            <thead>
                <tr>
                    <th>제목</th>
                    <th>년도</th>
                    <th>포스터</th>
                </tr>
            </thead>
            <tbody>
                {% for movie in movies %}
                <tr>
                    <td>{{ movie.title }}</td>
                    <td>{{ movie.year }}</td>
                    <td><img src="{{ movie.poster }}" class="img-thumbnail" style="max-width: 100px;"></td>
                </tr>
                {% endfor %}
            </tbody>
        </table>
        <a href="{{ url_for('index') }}" class="btn btn-primary">다시 검색</a>
    </div>
</body>
</html>
Part 2: MongoDB 데이터베이스
6️⃣ MongoDB란?
정의
MongoDB는 테이블과 행 대신 문서(Document)를 사용하여 데이터를 저장하는 NoSQL 데이터베이스입니다.
🔄 관계형 DB vs NoSQL
| 구분 | 관계형 DB (RDBMS) | MongoDB (NoSQL) |
|---|---|---|
| 데이터 저장 | 테이블 (Table) | 컬렉션 (Collection) |
| 데이터 단위 | 행 (Row) | 문서 (Document) |
| 쿼리 언어 | SQL | MongoDB Query |
| 스키마 | 고정적 | 유연함 |
| 예시 | MySQL, Oracle | MongoDB |
🌐 웹 서버 구조
웹서버 (Apache, IIS)
    ↓ 정적 페이지
WAS (Tomcat, JBoss...)
    ↓ 동적 페이지
DB (MySQL, MongoDB...)
    ↓ 데이터
7️⃣ MongoDB 설치
다운로드
https://www.mongodb.com/try/download/community- MongoDB Community Edition 다운로드
- 설치 진행
- 기본 포트: 27017
데이터 구조 비교
MySQL/MSSQL/Oracle
└── 데이터베이스 > 테이블 > 컬럼 > 데이터

MongoDB
└── 데이터베이스 > 컬렉션(Collection) > 데이터(Object)

Elasticsearch
└── 인덱스 > 문서(Document) > 데이터
8️⃣ pymongo 설치 및 연결 🔗
설치
pip install pymongoMongoDB 연결
from pymongo import MongoClient

# MongoDB 서버 연결
client = MongoClient('mongodb://localhost:27017/')

# 데이터베이스 선택
db = client['school_db']

# 컬렉션 선택
collection = db['students']
9️⃣ 데이터 삽입 (Create)
단일 문서 삽입
from pymongo import MongoClient

client = MongoClient('mongodb://localhost:27017/')
db = client['school_db']
collection = db['students']

# 단일 문서 삽입
student = {
    "name": "atfield1988",
    "age": 100,
    "grade": "A",
    "subjects": ["Math", "English"]
}

result = collection.insert_one(student)
print(f"삽입된 문서 ID: {result.inserted_id}")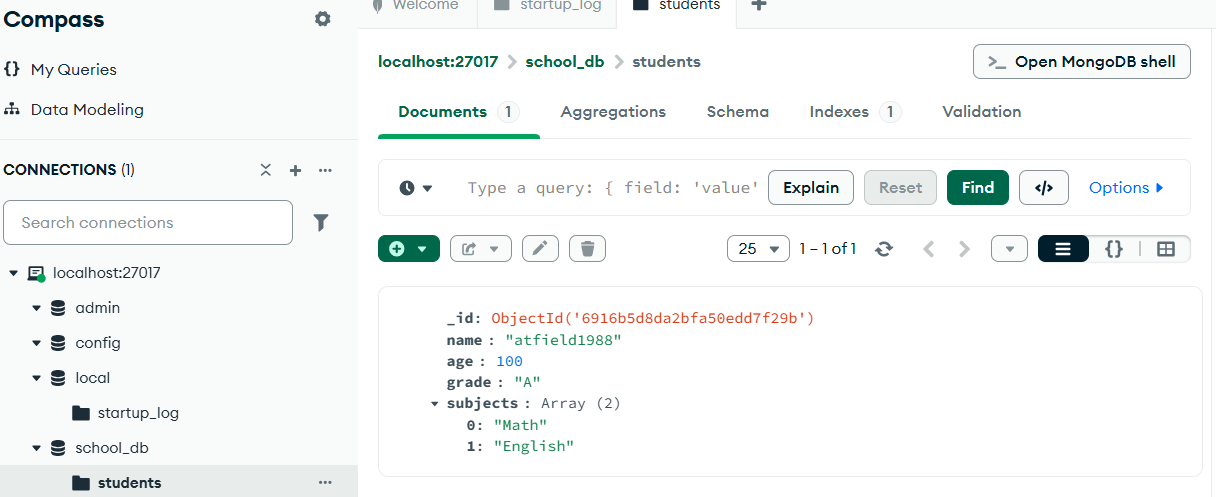
여러 문서 삽입
from pymongo import MongoClient

client = MongoClient('mongodb://localhost:27017/')
db = client['school_db']
collection = db['students']

# 여러 문서 삽입
students = [
    {"name": "이영희", "age": 19, "grade": "B", "subjects": ["과학", "국어"]},
    {"name": "박민수", "age": 21, "grade": "A", "subjects": ["수학", "과학"]}
]

result = collection.insert_many(students)
print(f"삽입된 문서 ID들: {result.inserted_ids}")
🔟 데이터 조회 (Read)
모든 문서 조회
from pymongo import MongoClient

client = MongoClient('mongodb://localhost:27017/')
db = client['school_db']
collection = db['students']

# 모든 문서 조회
print("모든 학생 데이터:")
for student in collection.find():
    print(student)
특정 문서 조회
# 단일 문서 조회
result = collection.find_one({"name": "김철수"})
print(result)

print("=" * 40)

# 조건에 맞는 문서 조회 (나이가 20 이상인 학생)
print("\n나이가 20 이상인 학생:")
for student in collection.find({"age": {"$gte": 20}}):
    print(student)
1️⃣1️⃣ 데이터 수정 (Update)
단일 문서 수정
from pymongo import MongoClient

client = MongoClient('mongodb://localhost:27017/')
db = client['school_db']
collection = db['students']

# 김철수의 학년을 A+로 변경
result = collection.update_one(
    {"name": "김철수"},
    {"$set": {"grade": "A+"}}
)

print(f"수정된 문서 수: {result.modified_count}")
여러 문서 수정
# 수학 과목을 수강하는 학생들의 학년을 B로 변경
result = collection.update_many(
    {"subjects": "수학"},
    {"$set": {"grade": "B"}}
)

print(f"수정된 문서 수: {result.modified_count}")
1️⃣2️⃣ 데이터 삭제 (Delete)
단일 문서 삭제
from pymongo import MongoClient

client = MongoClient('mongodb://localhost:27017/')
db = client['school_db']
collection = db['students']

# 이름이 박민수인 학생 삭제
result = collection.delete_one({"name": "박민수"})
print(f"삭제된 문서 수: {result.deleted_count}")
여러 문서 삭제
# 나이가 19인 학생들 삭제
result = collection.delete_many({"age": 19})
print(f"삭제된 문서 수: {result.deleted_count}")
1️⃣3️⃣ Faker를 사용한 가짜 데이터 생성
설치
pip install faker기본 사용법
from faker import Faker
# 한국어 Faker 객체 생성
fake = Faker("ko_KR")
# 가짜 데이터 생성
for _ in range(20):
print(fake.name())
print(fake.address())
print(fake.email())
print(fake.phone_number())
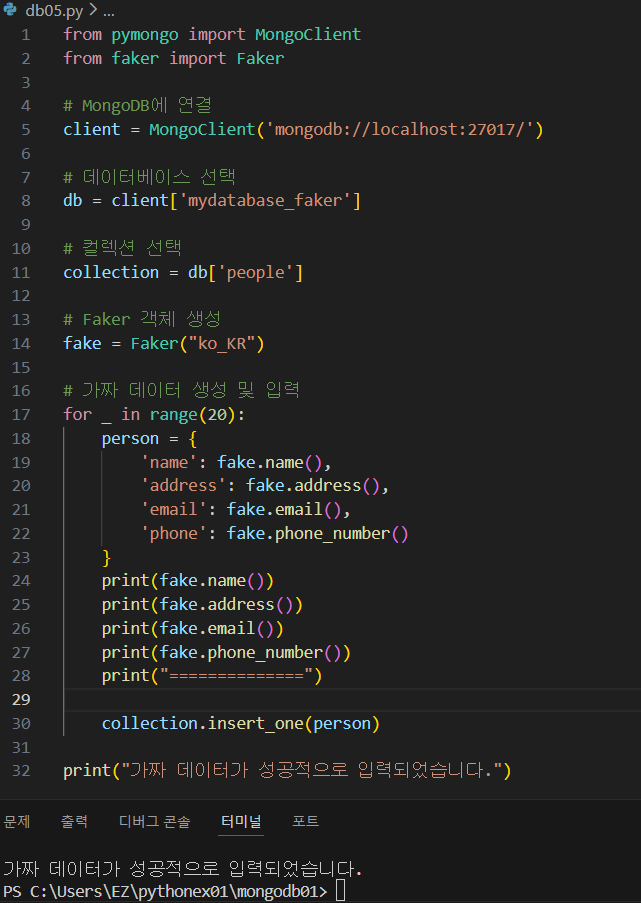
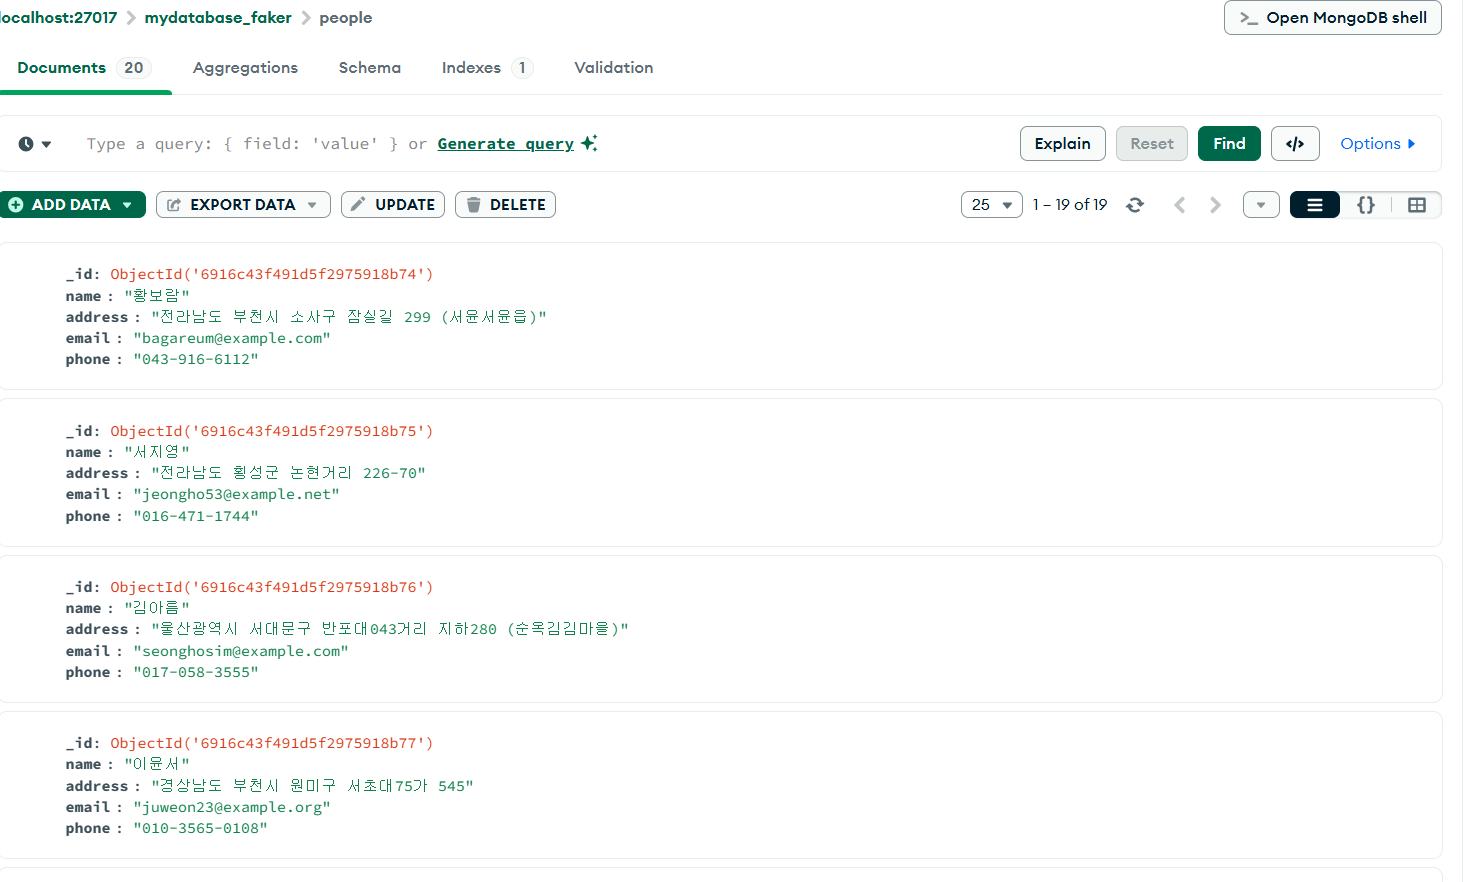
print("=" * 40)MongoDB에 가짜 데이터 삽입
from pymongo import MongoClient
from faker import Faker
# MongoDB 연결
client = MongoClient('mongodb://localhost:27017/')
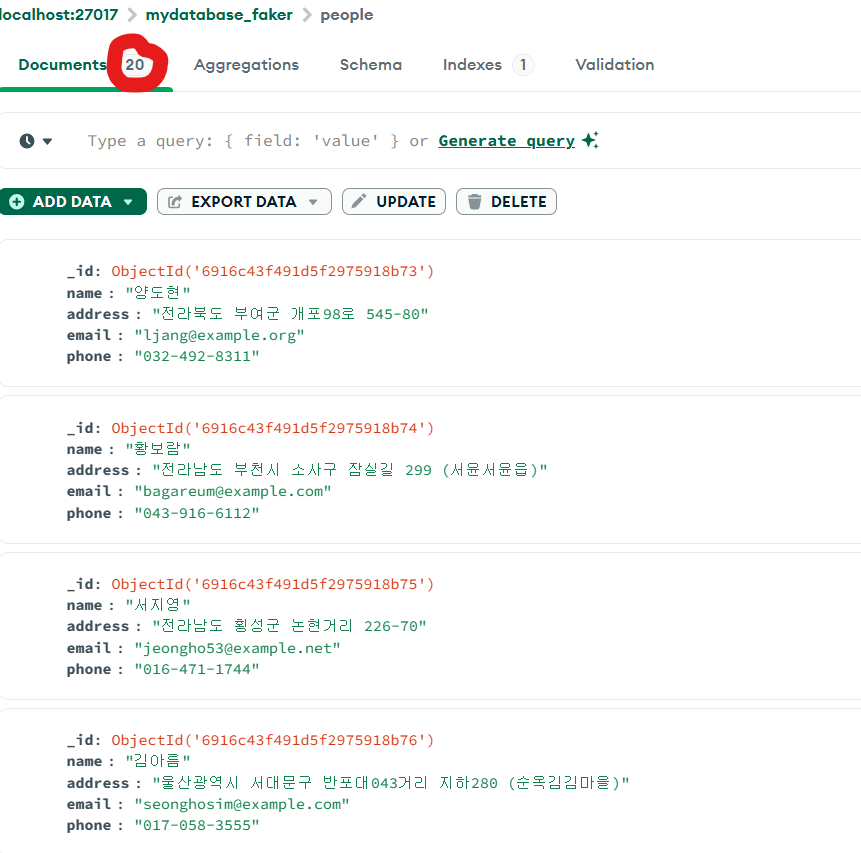
db = client['mydatabase_faker']
collection = db['people']
# Faker 객체 생성
fake = Faker("ko_KR")
# 가짜 데이터 20개 생성 및 입력
for _ in range(20):
person = {
'name': fake.name(),
'address': fake.address(),
'email': fake.email(),
'phone': fake.phone_number()
}
collection.insert_one(person)
print("가짜 데이터가 성공적으로 입력되었습니다.")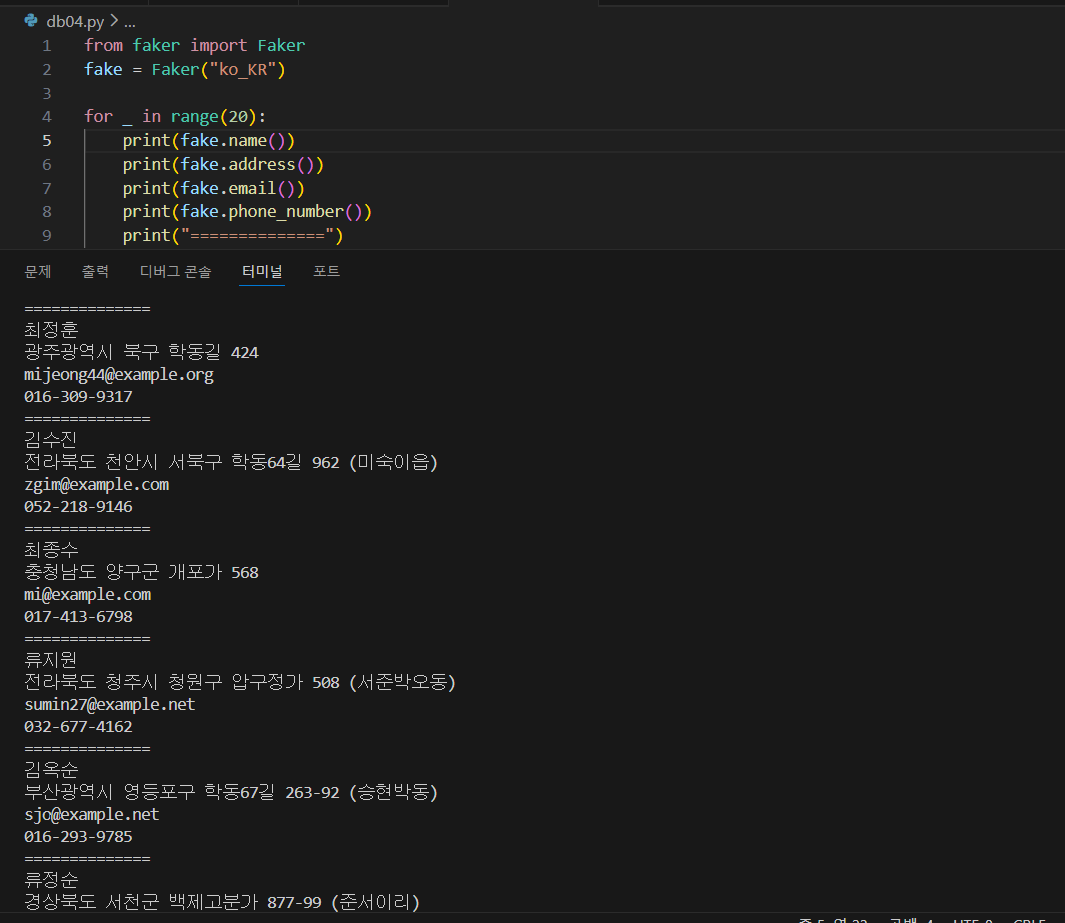
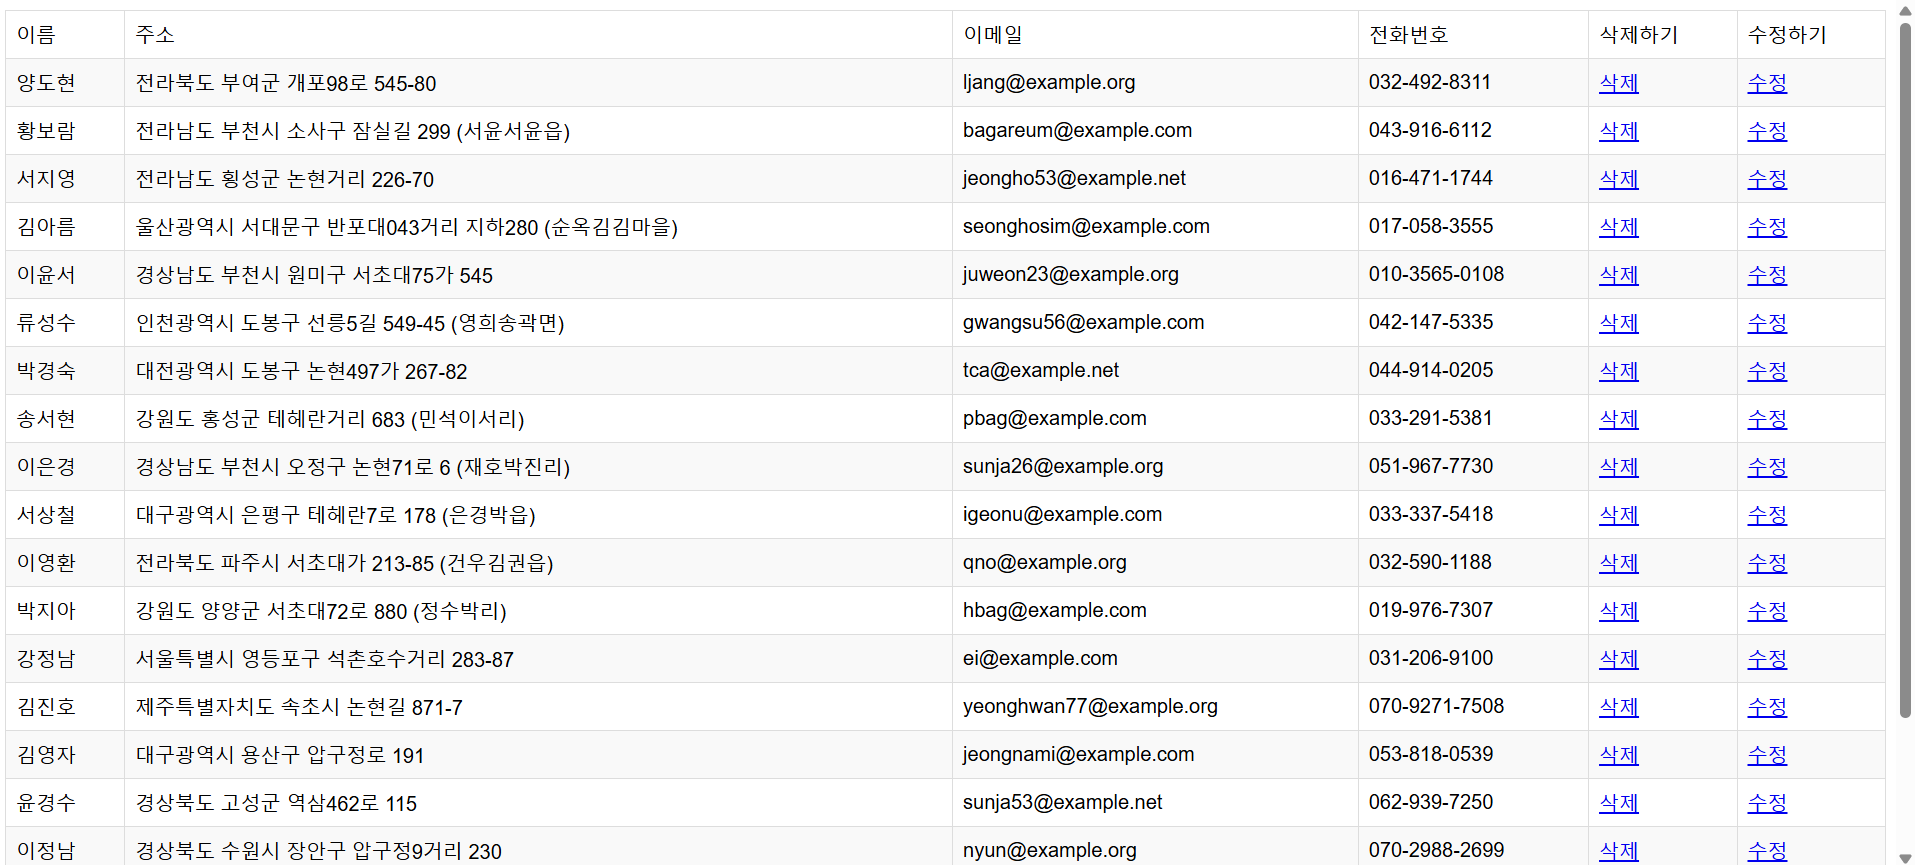
1️⃣4️⃣ 실습 2️⃣: Flask + MongoDB CRUD 시스템
요구사항
- MongoDB에서 people 데이터 조회
- 웹 페이지에 목록 표시
- 데이터 삭제 기능
- 데이터 수정 기능
Flask 앱 (app.py) - 기본 버전
from flask import Flask, redirect, render_template
from pymongo import MongoClient

app = Flask(__name__)

# MongoDB 연결
client = MongoClient('mongodb://localhost:27017/')
db = client['db_faker']
collection = db['people']

@app.route('/')
def index():
    people = collection.find()
    return render_template('list.html', people=people)

if __name__ == '__main__':
    app.run(debug=True)
목록 페이지 (templates/list.html) - 기본 버전
<!DOCTYPE html>
<html lang="en">
<head>
    <meta charset="UTF-8">
    <meta name="viewport" content="width=device-width, initial-scale=1.0">
    <link rel="stylesheet" type="text/css" href="{{ url_for('static', filename='style.css') }}">
    <title>사용자 목록</title>
</head>
<body>
    <h1> 사용자 목록</h1>
    <table>
        <tr>
            <th>이름</th>
            <th>주소</th>
            <th>이메일</th>
            <th>전화번호</th>
        </tr>
        {% for person in people %}
        <tr>
            <td>{{ person.name }}</td>
            <td>{{ person.address }}</td>
            <td>{{ person.email }}</td>
            <td>{{ person.phone }}</td>
        </tr>
        {% endfor %}
    </table>
</body>
</html>
1️⃣5️⃣ 삭제 기능 추가
Flask 앱 (app.py) - 삭제 기능 추가
from flask import Flask, redirect, render_template
from pymongo import MongoClient
from bson import ObjectId

app = Flask(__name__)

# MongoDB 연결
client = MongoClient('mongodb://localhost:27017/')
db = client['db_faker']
collection = db['people']

@app.route('/')
def index():
    people = collection.find()
    return render_template('list.html', people=people)

@app.route('/delete_user/<user_id>')
def delete_user(user_id):
    # ObjectId로 변환하여 삭제
    collection.delete_one({'_id': ObjectId(user_id)})
    return redirect('/')

if __name__ == '__main__':
    app.run(debug=True)
목록 페이지 (templates/list.html) - 삭제 버튼 추가
<!DOCTYPE html>
<html lang="en">
<head>
    <meta charset="UTF-8">
    <meta name="viewport" content="width=device-width, initial-scale=1.0">
    <link rel="stylesheet" type="text/css" href="{{ url_for('static', filename='style.css') }}">
    <title>사용자 목록</title>
</head>
<body>
    <h1> 사용자 목록</h1>
    <table>
        <tr>
            <th>이름</th>
            <th>주소</th>
            <th>이메일</th>
            <th>전화번호</th>
            <th>삭제</th>
        </tr>
        {% for person in people %}
        <tr>
            <td>{{ person.name }}</td>
            <td>{{ person.address }}</td>
            <td>{{ person.email }}</td>
            <td>{{ person.phone }}</td>
            <td><a href="{{ url_for('delete_user', user_id=person._id) }}"> 삭제</a></td>
        </tr>
        {% endfor %}
    </table>
</body>
</html>
1️⃣6️⃣ 수정 기능 추가
Flask 앱 (app.py) - 수정 기능 추가
from flask import Flask, redirect, render_template, request
from pymongo import MongoClient
from bson import ObjectId

app = Flask(__name__)

# MongoDB 연결
client = MongoClient('mongodb://localhost:27017/')
db = client['db_faker']
collection = db['people']

@app.route('/')
def index():
    people = collection.find()
    return render_template('list.html', people=people)

@app.route('/delete_user/<user_id>')
def delete_user(user_id):
    collection.delete_one({'_id': ObjectId(user_id)})
    return redirect('/')

@app.route('/edit_user/<user_id>', methods=['GET', 'POST'])
def edit_user(user_id):
    if request.method == 'POST':
        # 수정된 데이터 저장
        updated_data = {
            'name': request.form['name'],
            'address': request.form['address'],
            'email': request.form['email'],
            'phone': request.form['phone']
        }
        collection.update_one({'_id': ObjectId(user_id)}, {'$set': updated_data})
        return redirect('/')

    else:
        # 수정 페이지 표시
        person = collection.find_one({'_id': ObjectId(user_id)})
        return render_template('edit.html', person=person)

if __name__ == '__main__':
    app.run(debug=True)
목록 페이지 (templates/list.html) - 수정 버튼 추가
<!DOCTYPE html>
<html lang="en">
<head>
    <meta charset="UTF-8">
    <meta name="viewport" content="width=device-width, initial-scale=1.0">
    <link rel="stylesheet" type="text/css" href="{{ url_for('static', filename='style.css') }}">
    <title>사용자 목록</title>
</head>
<body>
    <h1> 사용자 목록</h1>
    <table>
        <tr>
            <th>이름</th>
            <th>주소</th>
            <th>이메일</th>
            <th>전화번호</th>
            <th>삭제</th>
            <th>수정</th>
        </tr>
        {% for person in people %}
        <tr>
            <td>{{ person.name }}</td>
            <td>{{ person.address }}</td>
            <td>{{ person.email }}</td>
            <td>{{ person.phone }}</td>
            <td><a href="{{ url_for('delete_user', user_id=person._id) }}"> 삭제</a></td>
            <td><a href="{{ url_for('edit_user', user_id=person._id) }}">수정</a></td>
        </tr>
        {% endfor %}
    </table>
</body>
</html>
수정 페이지 (templates/edit.html)
<!DOCTYPE html>
<html lang="en">
<head>
    <meta charset="UTF-8">
    <meta name="viewport" content="width=device-width, initial-scale=1.0">
    <link rel="stylesheet" type="text/css" href="{{ url_for('static', filename='style.css') }}">
    <title>사용자 수정</title>
</head>
<body>
    <h1>✏️ 사용자 정보 수정</h1>
    <form method="post" action="{{ url_for('edit_user', user_id=person._id) }}">
        <label>이름:</label><br>
        <input type="text" name="name" value="{{ person.name }}" required><br><br>

        <label>주소:</label><br>
        <input type="text" name="address" value="{{ person.address }}" required><br><br>

        <label>이메일:</label><br>
        <input type="text" name="email" value="{{ person.email }}" required><br><br>

        <label>전화번호:</label><br>
        <input type="text" name="phone" value="{{ person.phone }}" required><br><br>

        <input type="submit" value="수정 완료">
        <a href="{{ url_for('index') }}">취소</a>
    </form>
</body>
</html>
스타일시트 (static/style.css)
body {
    font-family: Arial, sans-serif;
    margin: 20px;
}

h1 {
    color: #333;
}

table {
    border-collapse: collapse;
    width: 100%;
    margin-top: 20px;
}

th, td {
    border: 1px solid #ddd;
    padding: 12px;
    text-align: left;
}

th {
    background-color: #f2f2f2;
    font-weight: bold;
}

tr:nth-child(even) {
    background-color: #f9f9f9;
}

tr:hover {
    background-color: #e8e8e8;
}

a {
    color: #4CAF50;
    text-decoration: none;
}

a:hover {
    text-decoration: underline;
}

form {
    max-width: 500px;
    margin: 20px 0;
}

input[type="text"] {
    width: 100%;
    padding: 8px;
    margin: 5px 0;
    box-sizing: border-box;
}

input[type="submit"] {
    background-color: #4CAF50;
    color: white;
    padding: 10px 20px;
    border: none;
    cursor: pointer;
    margin-top: 10px;
}

input[type="submit"]:hover {
    background-color: #45a049;
}
양도현 삭제 클릭!
📋 핵심 개념 정리
✅ API 활용
| 항목 | 설명 |
|---|---|
| OSINT | 공개 출처 정보 수집 |
| Shodan | 인터넷 연결 기기 검색 |
| OMDB | 영화 정보 API |
✅ MongoDB CRUD
| 작업 | 메서드 | 예시 |
|---|---|---|
| Create | insert_one(), insert_many() |
데이터 추가 |
| Read | find(), find_one() |
데이터 조회 |
| Update | update_one(), update_many() |
데이터 수정 |
| Delete | delete_one(), delete_many() |
데이터 삭제 |
🎯 프로젝트 흐름도
Flask 웹 애플리케이션
    ↓
사용자 입력 (검색, 수정, 삭제)
    ↓
API 요청 / MongoDB 쿼리
    ↓
데이터 처리
    ↓
템플릿 렌더링
    ↓
결과 표시
💡 실무 활용 사례
📌 보안 모니터링
- Shodan API로 자사 IP 노출 확인
- 취약점 스캔 자동화
- IoT 기기 보안 점검
📌 데이터 관리
- MongoDB를 사용한 유연한 데이터 저장
- 가짜 데이터로 테스트 환경 구축
- CRUD 기반 사용자 관리 시스템
인프라 활용을 위한 파이썬도 얼마 남지 않았다...
왜 이렇게 빨리 가지???
'SK Shieldus Rookies 29' 카테고리의 다른 글
| [SK shieldus Rookies 29기] 10일차 (0) | 2025.12.04 |
|---|---|
| [SK shieldus Rookies 29기] 9일차 (0) | 2025.12.04 |
| [SK shieldus Rookies 29기] 7일차 (0) | 2025.12.04 |
| [SK shieldus Rookies 29기] 6일차 (0) | 2025.12.04 |
| [SK shieldus Rookies 29기] 5일차 (0) | 2025.12.04 |
'SK Shieldus Rookies 29' Related Articles
more


